
Tuesday, October 21, 2014
Well, I am writing my last post here, at least for my needle felt work. I have started my own website so that I can have a more official place in the internet world as an artist. On that page I have a portfolio where you can see my work, links to my etsy shop and facebook page, and a blog where I post updates about my current projects. I hope you come to visit! http://www.plainssongstudio.com/
Wednesday, October 15, 2014
Needle Felted Barn Owl: Reflection

This piece is called 'Reflection' and is of a Barn Owl. Felting in all of those spots took a long time! The photo that I used for inspiration is the one on the right below. I am having trouble finding who took this photo, so if you know please leave it in the comments.


My owl has his head turning slightly to the side because I wanted it to have a bit more motion than the owl in the photo. What do you think? Does it seem to have movement, or is it static?


I like how you can see that the wing is folded in these three photos...


And finally, here you can see the back, and underside....


Monday, October 13, 2014
Needle Felted Little Owls
This next pair of owls is meant to depict two Little Owl (Athene noctua) chicks. The name 'Little Owl' is actually the accepted common name of this species, not just a cute way to describe them, although they are very cute!
 |
| I hope I got across how cute these little guys really are. |
 |
| Here he is from another angle. |
 |
| And here is the other Little Owl Chick.... |
 |
| And again from another angle. |
I titled the sculpture 'Vigilance' since they are both obviously looking at something far off. What do you thing that something is? Something good, or malevolent?
 |
| Needle felt Little Owl Chicks |
 |
I really like this photo angle, showing the space between the two. |
When I first conceived of this piece I thought of it as actually three little owls on a wall in window boxes. As it came closer to the show, and as I was working with them, I liked the dynamic of just two who were watching something from far off, instead of three. This photo below shows how I have them displayed in the gallery. The lighting is not the best there for photographs, but you get the idea.
 |
| Needle felted Little Owls. This sculpture is titled 'Vigilance.' |
Sunday, October 12, 2014
The Sisters
This sculpture is part of the 'A Parliament of Owls' exhibition that is at the Burkholder Project until Oct. 31st. It is based on a photo of a group of sibling Barn owls from a raptor rehabilitation center. At first I wanted to have five owls, but after I started to make them having all five together was just too overwhelming, so I decided three owls would be better.
I also was originally going to make them more realistic, but as I worked I liked the idea that this was more a sketch, an impression, of this group of Barn Owls. Sometimes it is important to remember that realism is not the ultimate goal, because there are other things that deserve expression as well.


I also was originally going to make them more realistic, but as I worked I liked the idea that this was more a sketch, an impression, of this group of Barn Owls. Sometimes it is important to remember that realism is not the ultimate goal, because there are other things that deserve expression as well.
 |
| Needle Felted Barn Owls, 'The Sisters' |
 |
| Needle felted Barn Owls from behind |
 |
| I think they look better when posed above eye level, but it was difficult to get a photo of this in the gallery. |
 |
| Needle Felted Barn Owl (Sister 2) |
 |
| Needle Felted Barn Owl (Sister 1) |
 |
| Needle Felted Barn Owl (Sister 3) |
Thursday, October 9, 2014
A Parliament of Owls: Needle Felt Sculptures
I currently have an exhibition at The Burkholder Project in Lincoln, Nebraska that is entirely comprised of owls. Of course I couldn't resist and decided to call it 'A Parliament of Owls.' For those who are not in the know, there is a list of Standard collective nouns in English that is used to describe large groups of animals. One of these collective nouns is 'Parliament of Owls.' According to Wikipedia this tradition is something that goes back to the Late Middle Ages, and though it was originally considered whimsical and humorous, many of these terms are still in use today.Here are some photos of my own parliament. They are all needle felted from wool, over a wire armature, and have either polymer clay or resin claws, beaks, and eyes. Enjoy!


Saturday, December 28, 2013
Polar Bear Tutorial Part 3 (Adding wool to fine tune the shape)
 The next part is to add wool so you can fine tune the shape of the sculpture to actually look like a bear. This is where we left off last time, but with the wool tucked under and around.


Here is the result of the wrapping and needle felting around the limbs. In the second picture you can see that the nose is not quite long enough, so I added wool to extend it. Overall the shape is pretty much what I was going for at this point. Next I just added more wool to smooth it out and needle felted it all as evenly as possible, which you can see on the following photo. I am not posting all of the photos here because there are a whole lot of them. If people show a desire to see them, I will make up a full tutorial to sell in my Etsy shop.

Now that I am happy with the general shape, the next step is to add wool to mimic the direction of the fur and to add the details: eyes, nose, mouth, tail, and paw pads.

 Here you can see my final polar bear and cub! I am very happy with how they turned out. I have since added another cub to this pair. Once I take better photos tomorrow morning, I will be putting them up for sale in my Etsy shop. So be sure to check my shop, or my facebook page, to be able to see them better. If you make anything using this tutorial, I would love to see it! Also, please leave any questions, or criticism in the comments.
  |
| I love that she can stand on her hind legs without falling over! |

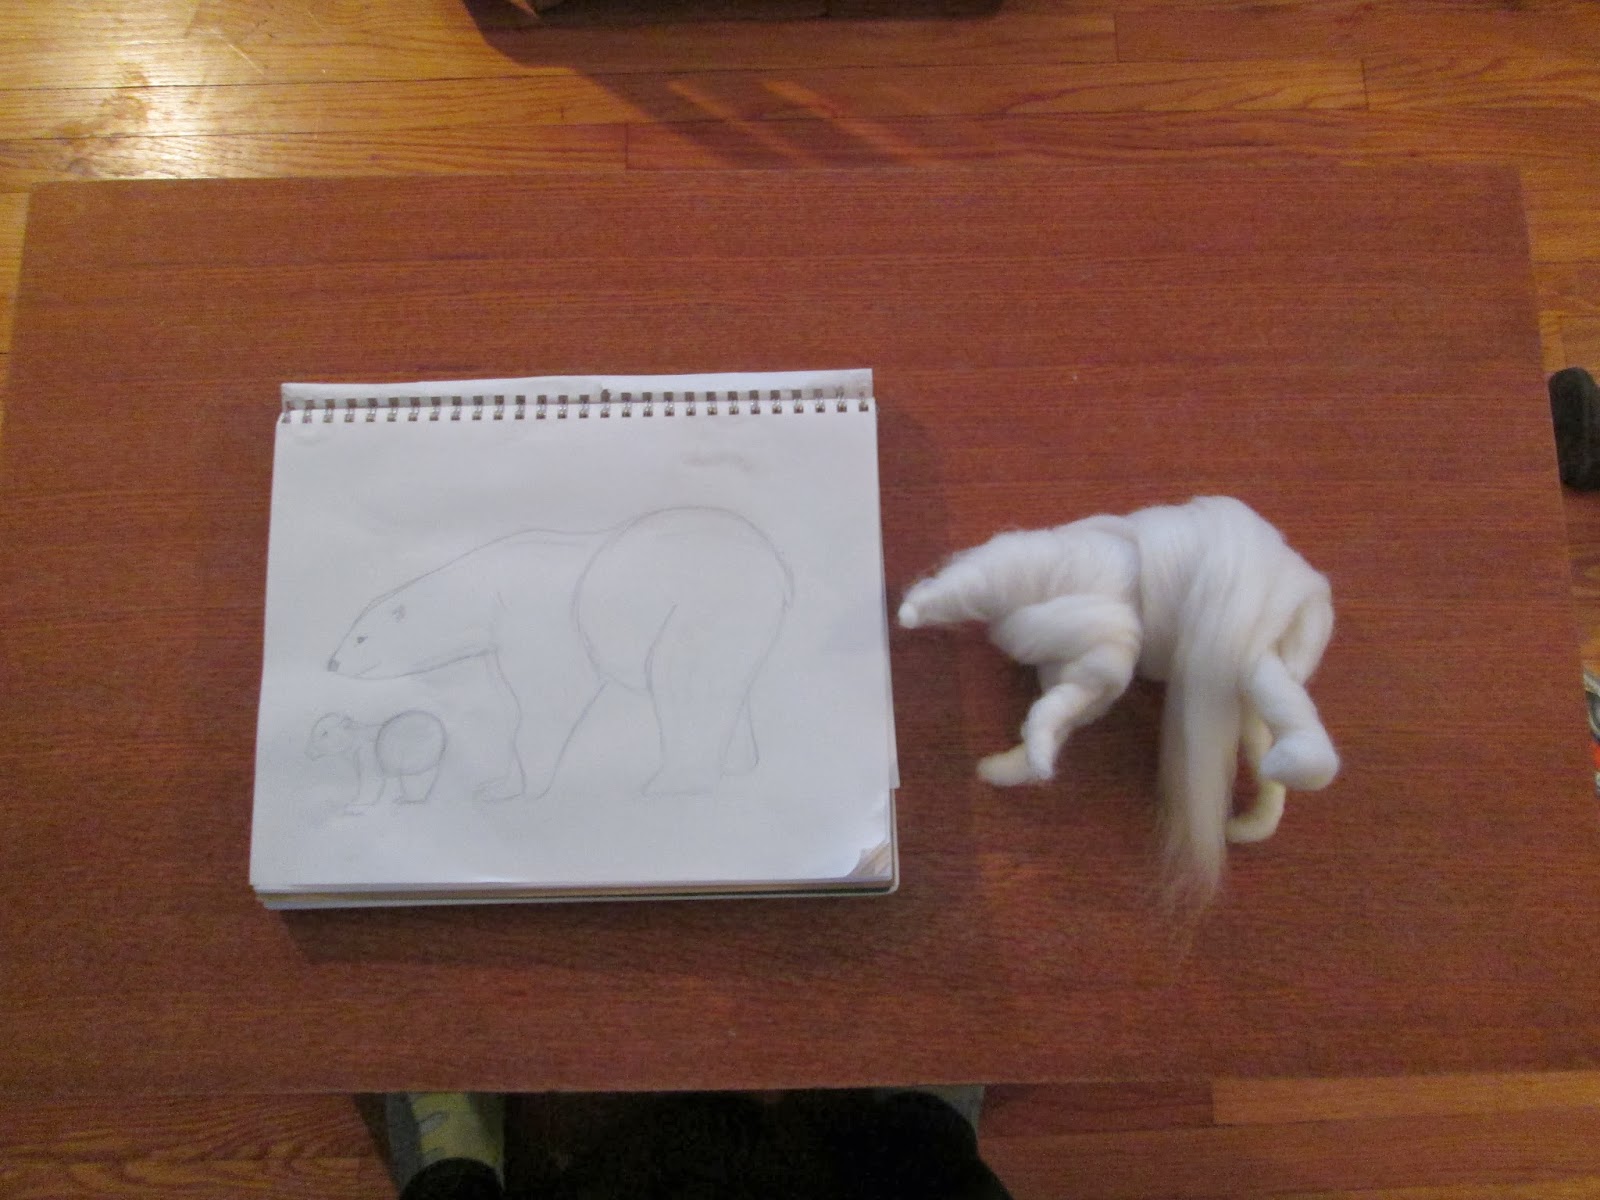
Polar Bear Tutorial Part 2 (Wrapping the frame with wool)
The next step is to wrap a little bit of wool around the frame. I tend to start at the limb attachment point and poke the wool with the needle after a few turns just to get it to stay in place. Then I wrap all the way down and around the foot loop. I felt through the loop, also to get the wool to stay in place. You don't have to felt it a whole lot around the wire as long as you anchor it down on the ends. Wrap the whole frame so that the when you add larger pieces of wool you can get it to stay in place as you felt it down.

After you wrap the whole frame, take larger pieces of wool and wrap them around to build up bulk. I use wool roving so that is why my wool is in strips. However you can do it with wool batts or whatever you prefer.
When adding strips of roving to my sculpture, I first attach the strip from the beginning of where I want to start to wrap it. In the above photo I attached this piece at the shoulder in order to wrap it around the leg. By doing this I am mimicking the musculature of the animal, thus creating a more realistic end result.
As I am working, I keep my sketch close by so I can compare my sculpture to it. It needs a lot more wool at this point, but the general shape and proportion are OK.

After you wrap the whole frame, take larger pieces of wool and wrap them around to build up bulk. I use wool roving so that is why my wool is in strips. However you can do it with wool batts or whatever you prefer.
 |
| Here you can see how I built up the body first, and am now adding wool around a foreleg. |
 |
As I am working, I keep my sketch close by so I can compare my sculpture to it. It needs a lot more wool at this point, but the general shape and proportion are OK.
 |
Subscribe to:
Posts (Atom)