Saturday, December 28, 2013

Polar Bear Tutorial Part 2 (Wrapping the frame with wool)

The next step is to wrap a little bit of wool around the frame.  I tend to start at the limb attachment point and poke the wool with the needle after a few turns just to get it to stay in place.  Then I wrap all the way down and around the foot loop.  I felt through the loop, also to get the wool to stay in place.  You don't have to felt it a whole lot around the wire as long as you anchor it down on the ends.  Wrap the whole frame so that the when you add larger pieces of wool you can get it to stay in place as you felt it down.


After you wrap the whole frame, take larger pieces of wool and wrap them around to build up bulk.  I use wool roving so that is why my wool is in strips.  However you can do it with wool batts or whatever you prefer.

Here you can see how I built up the body first, and am now adding wool around a foreleg.

When adding strips of roving to my sculpture, I first attach the strip from the beginning of where I want to start to wrap it.  In the above photo I attached this piece at the shoulder in order to wrap it around the leg.  By doing this I am mimicking the musculature of the animal, thus creating a more realistic end result.


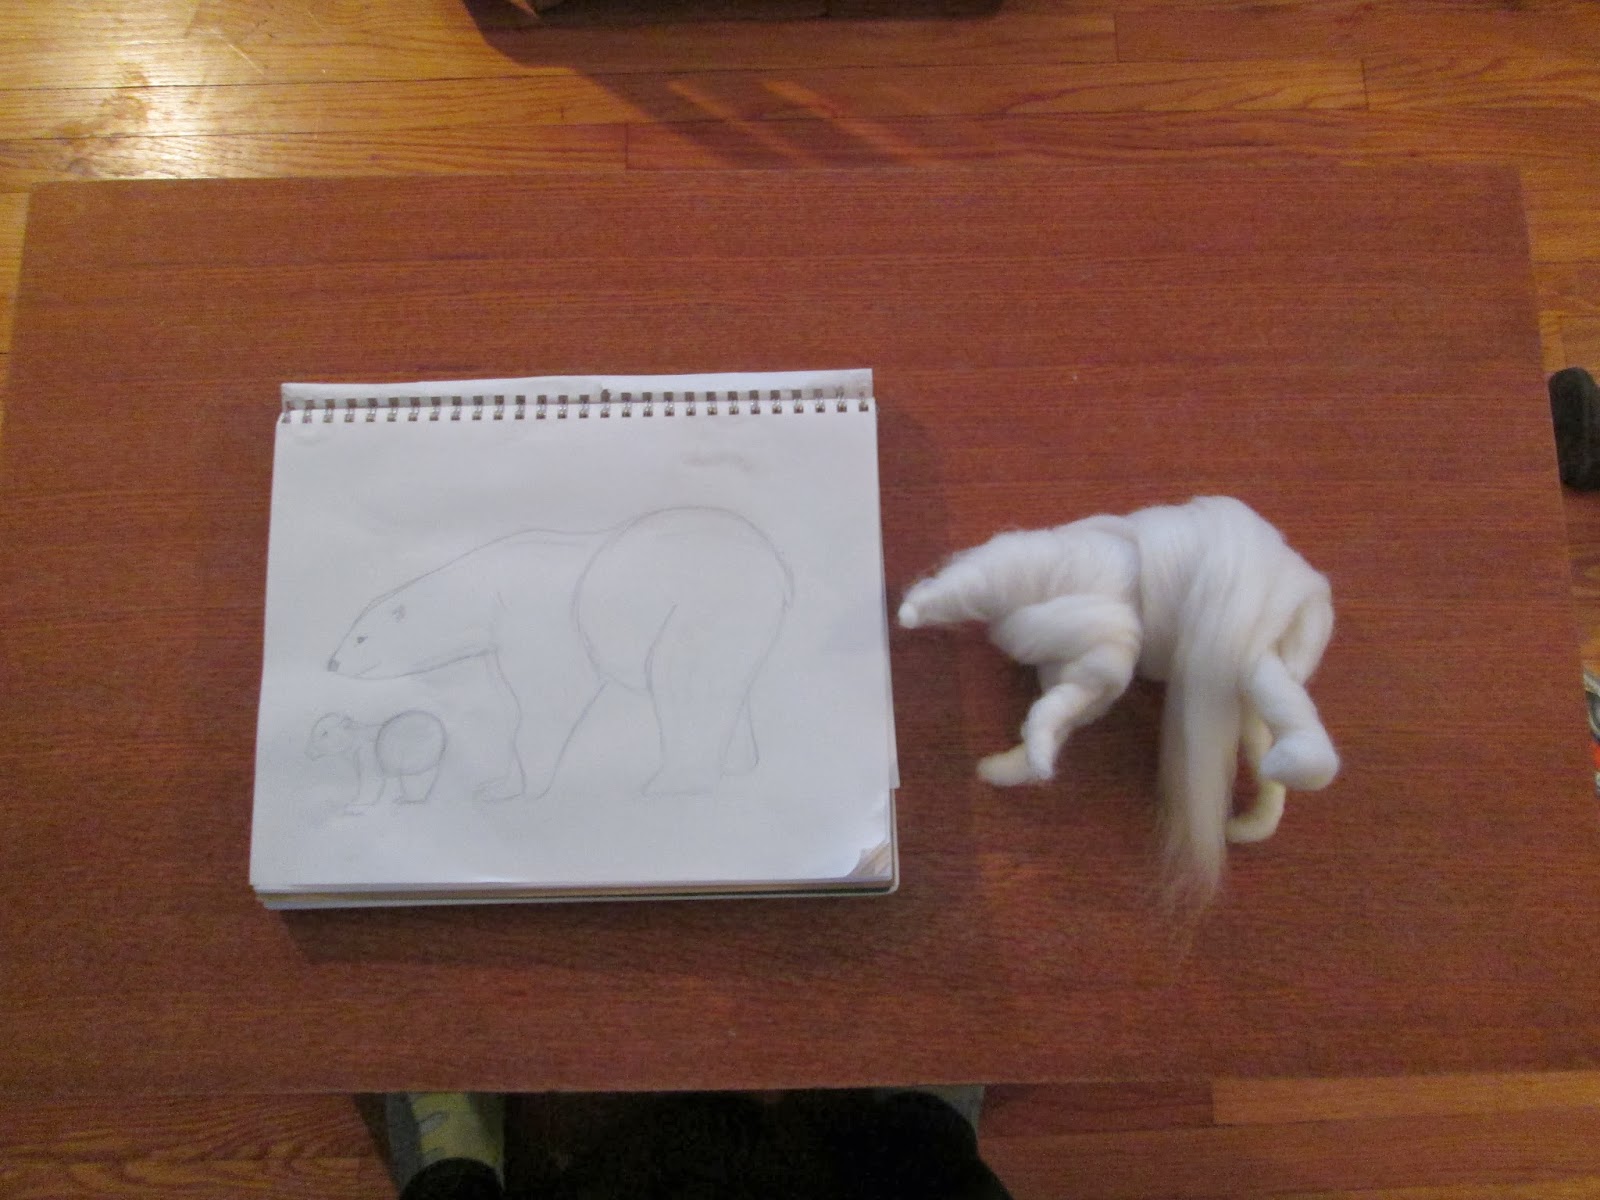
As I am working, I keep my sketch close by so I can compare my sculpture to it.  It needs a lot more wool at this point, but the general shape and proportion are OK.

Polar Bear Tutorial Part 1 (making the wire frame)

     This is the first needle felting tutorial I have ever made so please let me know if anything is unclear.  During this first part I will show you how I made the wire frame for these polar bears.

Needle felt polar bear

     The large polar bear is the one that is being used as the example, but the baby was made in the same way.  Because they have wire frames they are pose-able which adds a fun dimension to them as sculptures.  Please keep in mind that the steps I show are not concrete and are only the way I happened to get from the beginning to the end.  There are many ways that one could have gotten to the same place.  Well, lets begin....

First I gathered the things I will be using:  paper, pencil, eraser, ruler, wire, and wire cutters.  The wire I used is 20 gauge galvanized steel wire that I got at the hardware store.  Lots of people use jewelry wire or pipe cleaners, but I think that this steel wire is stronger and a whole lot cheaper.

Add caption
Next, I found some source material to make sketches.  I used a mammal guide book and a natural geographic kids magazine to draw some generalized polar bears.  


This is the sketch I came up with.   


This is the sketch with my wire frame pieces.
After making the initial drawing I cut a length of wire to make the 'skull' and 'spine.' It needs to be twice the length that fits inside the drawing.  Twist the wire to make the 'spine,' leaving a loop to mimic the skull.  By laying it over your drawing you can predict how large you sculpture will be and also be confident that the proportions will be correct.  Next I cut a piece of wire for the back legs.  This wire needs to be four times the length of one leg, plus a little extra for the twisting.  Bend it in half, which is where it will meet the 'spine.'  Make a loop (which will be the foot) on each side and twist the wire back up toward the spine.  Next you can attach it to the spine by twisting it around the spine several times in the spot where your drawing indicates the attachment should be.  The front legs are made using the same process.

needle felt bear tutorial
This is the wire frame I came up with for my polar bear.  Good luck, and until next time!

Monday, March 18, 2013

Plains Song on Etsy


I spent the better part of my evening setting up an Etsy shop so that I can start selling my needlefelt sculptures.  I have a lot to learn about Etsy and selling in general, but getting this stuff posed is a start.  I have a few rabbits and a lamb that I am hoping I can sell for Easter, and two of them are the ones pictured here.  This is the link to my shop; go check it out! .http://www.etsy.com/shop/Plainssong

Tuesday, March 12, 2013

Spring Break


Joseph is on Spring break this week.  Yesterday he got pretty board, so I was kind of dreading what the rest of the week would be like.  However, as it usually goes when I dread something it turned out pretty OK, and actually ended up being a fun day.  While Tommy was at preschool, I took Joseph and Theo to the hardware store and craft store to get some supplies for my sculptures.  While at Hobby Lobby we happened upon this set of three little sail boats.

Saturday, January 26, 2013

The Wind in the Willows; not just a story about Animals

 I am reviewing all of my previous posts and I wrote this a long time ago and never published it. I liked what I had written, so I decided to preserve it.


changing play

This is another post that I just found that was a draft that I decided to keep.  Joseph must have been about 2 and a half.

Friday, January 30, 2009

When in Rains, it pours.

I really ought to wright more here. I can't believe the last time I wrote anything was in November. Part of why I write here is that I am really bad at keeping a journal the last few years. Well, hopefully I am back now.

Joseph fell in the bathtub tonight. He was standing on one foot washing the other, and then he just tipped. He had to get 6 stitches or so (I wasn't there, so I didn't see.) Poor thing.

I had a car accident recently, and Tommy just had stitches on Monday. I am crossing my fingers that nothing happens to Jim.