 The next part is to add wool so you can fine tune the shape of the sculpture to actually look like a bear. This is where we left off last time, but with the wool tucked under and around.
Here it is after I have needle felted it a bit, and also compared to the sketch. Remember to always compare it to your source material so you stay on track!
Since I want to make this bear pose-able, I am making sure to felt the joints well. As you wrap, it can leave a depression between the joints if you are not careful. If you take care to remedy this, when posing the sculpture it will help with looking realistic. I move the limbs around as I am doing this so as to make sure that I have felted the wool enough to get it all to stay in place when the limbs are moved for posing. However, you actually don't want to felt it too hard if you want it to be pose-able.
After I felt the places where the wool meets in the joints, I lay a piece of wool over the joint to cover up where the wool meets from different sections.
Here you can see how the back leg looks after that wrap, and I am also beginning to add wool to the front leg. Again, begin the attachment at the shoulder joint in order to mimic realistic musculature.

Here is the result of the wrapping and needle felting around the limbs. In the second picture you can see that the nose is not quite long enough, so I added wool to extend it. Overall the shape is pretty much what I was going for at this point. Next I just added more wool to smooth it out and needle felted it all as evenly as possible, which you can see on the following photo. I am not posting all of the photos here because there are a whole lot of them. If people show a desire to see them, I will make up a full tutorial to sell in my Etsy shop.
Now that I am happy with the general shape, the next step is to add wool to mimic the direction of the fur and to add the details: eyes, nose, mouth, tail, and paw pads.
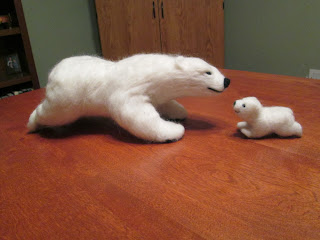
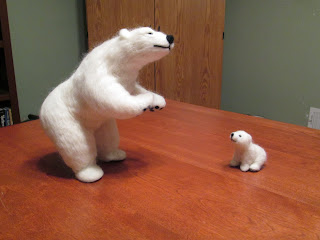
 Here you can see my final polar bear and cub! I am very happy with how they turned out. I have since added another cub to this pair. Once I take better photos tomorrow morning, I will be putting them up for sale in my Etsy shop. So be sure to check my shop, or my facebook page, to be able to see them better. If you make anything using this tutorial, I would love to see it! Also, please leave any questions, or criticism in the comments.
  |
| I love that she can stand on her hind legs without falling over! |


3 comments:
Your work is AWESOME! So glad to have met you!
Love, love love this tutorial! I am having a go at making a bear and her baby right now!
Thank you so much! Great tutorial😊
Post a Comment